


Winter is officially here, which means it’s the perfect time for cosy and delicious food! Our Comfort Cooking collection is full of amazing books with seasonal recipes from expert foodies like Julia Busuttil Nishimura, Josh Niland and more. Today we’re featuring a recipe for steak and Vegemite pie from Michael and Pippa James’ ode to savoury treat lovers, All Day Baking.
Happy cooking!
 Steak and Vegemite Pie
Serves: 6
This riff on the ubiquitous Australian bakery classic uses Vegemite to bring saltiness and some yeasty umami to the pie. Top tip: Vegemite is a great addition to stocks and braises; I have even used it in desperation to make a stock cube more flavoursome. But remember, a little goes a long way – just like on your toast!
In the initial braise of the beef, you want to take it to the point where it’s no longer tough, but no further than that. Remember that it will cool in the liquid and then go back in the oven once it’s in the pie case, so it will have a chance to cook more later.
Ingredients
100 g (3½ oz) olive oil
2 medium onions, roughly chopped
2 large carrots, roughly chopped 3 medium celery stalks, chopped 4 garlic cloves, chopped
1 tablespoon thyme
800 g (1 lb 12 oz) chuck or skirt steak, cut into 2 cm (¾ in) cubes
1 × 400 g (14 oz) tin whole peeled tomatoes
60 g (2 oz) malt vinegar
9 g (1/3 oz/1½ teaspoons) fine salt
1 teaspoon freshly ground black pepper
1 teaspoon Vegemite or Marmite
5 g (1/5 oz/1 teaspoon) potato starch
10 g (1/3 oz/2 teaspoons) water
pastry of choice (see Pie basics, page 22, or the pastry recipes below)
Method
Heat 50 g (1¾ oz/2½ tablespoons) of the olive oil in a large heavy-based saucepan or cast-iron casserole dish over a low heat. Add the onion, carrot, celery, garlic and thyme and cook with the lid on, stirring occasionally, for 8–10 minutes until softened.
Meanwhile, heat the remaining 50 g (1¾ oz/2½ tablespoons) olive oil in a large heavy-based frying pan over a medium–high heat. Brown the beef in batches and set aside.
Add the tomatoes, vinegar, salt and pepper and Vegemite to the veggies, then add the browned beef. Use water (or beef stock or red wine if you have it) to rinse out the tomato tin and to deglaze the frying pan you cooked the beef in, pouring the water into the pan with the vegetables and beef until the meat is just covered – roughly three tins’ worth. Stir to combine. Bring to the boil, then reduce the heat to low and simmer for about 2 hours, or until the beef is tender but not mushy. Check the pan frequently and skim any scum or oil off the top.
Strain the cooked beef mixture into a colander set over a bowl, reserving the liquid. Return the liquid to the pan and reduce it over a high heat until you have about 500 g (1 lb 2 oz) left.
Combine the potato starch and water, then whisk it into the liquid in the pan. Add the beef and vegetables, stirring to combine. Remove the pan from the heat. Once it’s cooled a little, check the seasoning, adding more salt and pepper, to taste. Refrigerate for a few hours or overnight before assembling and baking your pie(s) (see page 22).
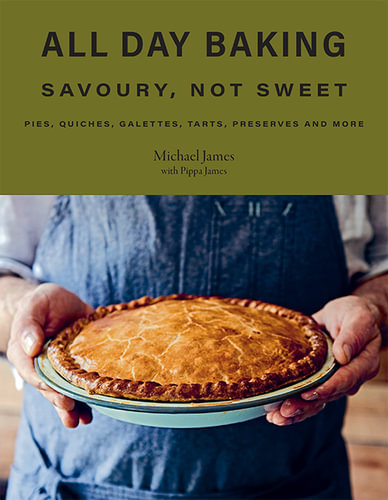
The pictured pie was made using savoury shortcrust pastry for the base and plain puff pastry for the top. The pie was garnished with poppy seeds.
Savoury Shortcrust Pastry
Makes: 560 gm (1 lb 4 oz)
This is the pastry I use for all savoury pie bases, whether for individual pies or a large one. Being very sturdy, it can also be used as a base for quiches.
The leftover dough or trimmings can be used again until they are used up, although the texture will change. It’s very easy to make, and is therefore a good pastry introduction for children learning alongside you.
Once made, the dough will set hard because it has lots of butter, so take it out of the fridge at least an hour before you roll it so that it’s malleable without being soft.
Ingredients
110 g (4 oz) water, at room temperature
10 g (⅓ oz/2 teaspoons) white vinegar
320 g (11½ oz) plain (all-purpose) flour
10 g (⅓ oz) fine salt
110 g (4 oz) unsalted butter, chilled and cut into 1 cm (½ in) cubes
Method
Combine the water and vinegar in a jug. Put the flour and salt in a mound on your kitchen bench and scatter the chilled butter over the top. Use a rolling pin to roll the butter into the flour, gathering the flour back into the middle as you go with a dough scraper or spatula.
Make a well in the middle and add the water and vinegar mixture. Continue using the dough scraper to fold the flour over the liquid and gently work it in with your hands, working from the outside in, until the dough just comes together. The dough should be firm and not sticky to the touch.
Roll out or press the dough into a rectangle 2–3 cm (¾ –1¼ in) thick (exact dimensions are not important here). Fold one-third of the dough into the middle, then the other third over the top of that, as if folding a letter. Rotate the dough 90 degrees and roll it out again into a rectangle 2–3 cm (¾ –1¼ in) thick, then repeat the letter fold. Don’t worry about making these folds perfectly neat – this is just to finish bringing the dough together and layering the butter, which results in a lovely flakiness.
Flatten the dough into a rectangle about 2 cm (¾ in) thick. Wrap the dough and rest it in the fridge for at least 1 hour, or overnight, before using. The pastry will keep for 1 week in the fridge, or up to 3 months in the freezer.
If you prefer to use a stand mixer to make this dough, put the flour, salt and butter cubes in the bowl of the mixer fitted with the paddle attachment. Mix on low speed to break the butter into the flour until you have shards of butter still visible and the mixture starts to look yellow.
With the mixer running, slowly pour in the vinegar mixture and mix until the dough just comes together. You don’t want any dry pieces, but you need to be careful not to overwork it. You can add a bit more water if you have any dry clumps, but don’t let the dough get sticky.
Proceed with the above rolling and shaping instructions from here.
Puff Pastry
Makes: 830 gm (1 lb 13 oz)
Puff pastry can look spectacular and has many uses. Making it is not as difficult as you might think. In particular, the perception that it’s time consuming can be off-putting; it does take time, but it’s short bursts of work punctuated by long rests. I recommend breaking down the process into small chunks: prepare the dough and butter block two days before you want to bake, laminate the butter into the dough the next day, then let it rest overnight in the fridge before using.
This recipe is tried and tested and gives excellent results. It is set up so that you can use a standard 250 g (9 oz) block of butter. It may make more pastry than you need, but if you are going to invest the time to make it, you’ll be thankful that you’ve got some ready to go for next time and, once made, it freezes really well.
Take note of the weather and observe how the butter is performing. If it’s too soft, it might need more time in the fridge between folds; if it’s too hard, it will crack. The vinegar helps to prevent discolouration and also helps with the gluten cross-linking.
Ingredients
70 g (2½ oz) unsalted butter, chilled
150 g (5½ oz) chilled water
10 g (⅓ oz/2 teaspoons) white vinegar
340 g (12 oz) plain (all-purpose) flour
10 g (⅓ oz) fine salt
For Laminating
250 g (9 oz) block unsalted
butter, at room temperature
Wholemeal Variation
70 g (2½ oz) unsalted butter, chilled
180 g (6½ oz) chilled water
10 g (⅓ oz/2 teaspoons) white vinegar
170 g (6 oz) wholemeal (whole-wheat) flour
170 g (6 oz) plain (all-purpose) flour
10 g (⅓ oz) fine salt
Whole Rye Variation
70 g (2½ oz) unsalted butter, chilled
180 g (6½ oz) chilled water 10 g (⅓ oz/2 teaspoons) white vinegar
135 g (5 oz) rye flour or wholegrain rye flour
205 g (7 oz) plain (all-purpose) flour
10 g (⅓ oz) fine salt
Method
Day 1
Take the 70 g (2½ oz) butter out of the fridge, cut it into 1 cm (½ in) cubes and leave to soften slightly for 10 minutes before you start – you want it to be cold but pliable.
Combine the water and vinegar in a jug. Put the flour, salt and butter cubes in the bowl of a stand mixer fitted with the paddle attachment. Mix on low speed to break the butter into the flour until you have shards of butter the size of rolled oats still visible. With the mixer running, slowly pour in the vinegar mixture and mix until the dough just comes together. You don’t want any dry pieces, but you need to be careful not to overwork the dough.
Flatten the dough into a rectangle about 1 cm (½ in) thick. Wrap the dough and rest it in the fridge for 2 hours, or overnight.
Meanwhile, prepare the butter for laminating. Place the butter block between two sheets of baking paper and use a rolling pin to roll it into a rectangle roughly measuring 18 × 20 cm (7 × 8 in). Put the butter in the fridge, between the sheets of baking paper, and refrigerate for 2 hours, or overnight.
Day 2
Remove the dough and rolled-out butter from the fridge about 30 minutes before you laminate the pastry. You want the butter to be malleable but not too soft.
Lightly dust your kitchen bench with flour. Lay the dough rectangle on the bench with one short side parallel with the edge of the bench. Roll the dough away from you to form a rectangle measuring 20 × 40 cm (8 × 15¾ in), still with the short side closest to you.
Place the butter block in the middle of the dough, with the 20 cm (8 in) side of the butter parallel with the bench. Fold both free short sides of the dough over the top of the butter so they meet in the middle, encasing the butter. Lightly pinch the ends together to seal (the seam should run parallel with the bench).
Rotate the dough block 90 degrees so the seam is now perpendicular to the bench. Using your rolling pin, gently press or stamp along the length of the dough to make it more malleable (you can do this at any stage in the process to make the dough easier to work with). Next, roll the dough away from you to form a 20 × 40 cm (8 × 15¾ in) rectangle, again with one short side parallel with the bench. Starting from the side closest to you, fold the bottom third of the dough into the middle, then the top third over the top of that, as if folding a letter. Refrigerate for 20 minutes.
Put your dough on the bench with the open seam on your right-hand side and perpendicular to the edge of the bench. Roll the dough away from you to form a 20 × 40 cm (8 × 15¾ in) rectangle. Fold the bottom third of the dough into the middle, then the top third over the top of that, as if folding a letter. Repeat this step until you have completed four single (or letter) folds in total. Refrigerate your pastry for 1 hour after every two folds to keep the butter from getting too soft (refrigerate for 30 minutes after every fold if it’s a warm day). If you have kept the pastry in the fridge for more than 1 hour, allow to stand for 10–15 minutes before continuing (reduce this time in hot weather).
Once all four folds are done, wrap your pastry and rest it in the fridge for at least 6 hours, or preferably overnight, before you use it. Chilling the pastry before using it prevents it from shrinking. Roll it out to whatever thickness you need. The pastry will keep for 3–4 days in the fridge, or up to 1 month in the freezer.
—This is an edited extract from All Day Baking by Michael and Pippa James published by Hardie Grant Books $45.00 and is available where all good books are sold.
Photographer: © Lisa Cohen

All Day Baking
Limited Signed Copies Available!
For every two lovers of sweet baked treats, there is at least another who will take the gruyere gougere or the curry pastie every time, thank you.
All Day Baking: Savoury, Not Sweet is a baking cookbook – at last – for them. Its mission is to deliver comforting, inventive and wholegrain-forward ideas for pies, sausage rolls, pasties and myriad other mostly pastry-based recipes, alongside...
 The Best Books of 2021: Food and Drink
Comments
No comments